Woohoo, time for the fun stuff, designing!
So last week on the One Room Challenge- Week 1, we walked through the bathroom and pointed out all the ugly and dysfunctional parts of it. We also established that we need to mix my rustic style and my husbands glam style. Now to actually making that happen.
Starting with the layout, I built out the bathroom on my modeling software and input the measurements. Then I added in what I wanted, starting with the tub of course. Here is what came out:
 Then I started sourcing the materials and putting them on the mood board, making tweaks as I got more, so that it will all match. Let’s go one by one and then see the full design, shall we?
I started with the tub, since that was most important to me. Reaching out to my favorite all-things-water vendor Posh Home Bath, I sent him the measurements and asked if it was even possible (the space was pretty small). After some back and forth we got to this tub:
Then I started sourcing the materials and putting them on the mood board, making tweaks as I got more, so that it will all match. Let’s go one by one and then see the full design, shall we?
I started with the tub, since that was most important to me. Reaching out to my favorite all-things-water vendor Posh Home Bath, I sent him the measurements and asked if it was even possible (the space was pretty small). After some back and forth we got to this tub:
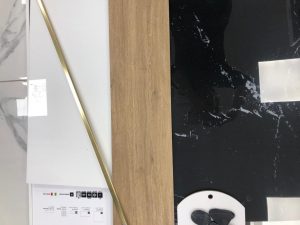
 Once we had the bath, I went for the tiles. I wanted black and gold, hubby wanted glossy black with marbled white. So off we go to my favorite tile store Royal Tiles and Granite and picked out the tiles. I drove them quite crazy going back and forth but in the end we settled on a gorgeous black tile for the floors, a simple white tile for the walls, and a beautiful gold metal detail to go with the white tiles behind the vanity. Heres the samples:
 Now, for the shower. Considering the placement I knew we needed glass walls so the bathroom would stay open and beautiful. So I ordered the simplest ones, with help from my contractor to make sure I was getting the right ones. The shower body was once again sourced from Posh Home Bath to coordinate with the tub faucet.
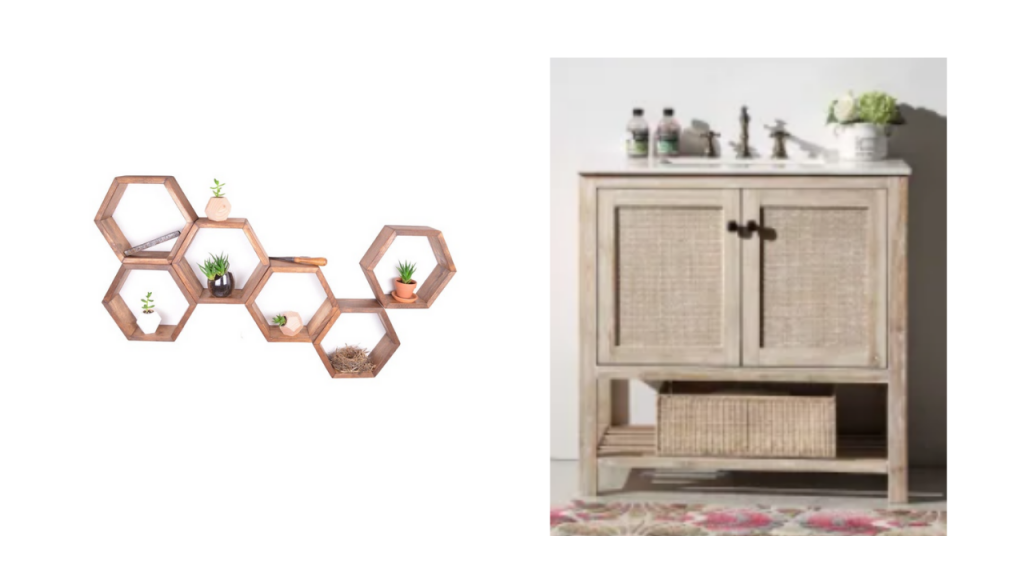
The vanity was probably the hardest part. We had to find one that matched the style, which was vintage modern and then also one that matched the color. We finally settled, after hours of searching, on a teak vanity with storage that was narrow enough to fit the space. Then it bothered me that we did not have any other teak items in the bathroom, so I explored Etsy and found some gorgeous teak shelving to put above the toilet to the left of the window. Here they are:
Now, for the shower. Considering the placement I knew we needed glass walls so the bathroom would stay open and beautiful. So I ordered the simplest ones, with help from my contractor to make sure I was getting the right ones. The shower body was once again sourced from Posh Home Bath to coordinate with the tub faucet.
The vanity was probably the hardest part. We had to find one that matched the style, which was vintage modern and then also one that matched the color. We finally settled, after hours of searching, on a teak vanity with storage that was narrow enough to fit the space. Then it bothered me that we did not have any other teak items in the bathroom, so I explored Etsy and found some gorgeous teak shelving to put above the toilet to the left of the window. Here they are:
 Last but not least we needed lights and a mirror. The mirror was easy, I picked a simple one off wayfair because the wall behind it was so pretty with the gold detail. For the lights, I reached out to my lighting vendor Malka Frost Lighting and we selected some high hats and a stunning sconce for over the tub, as shown here:
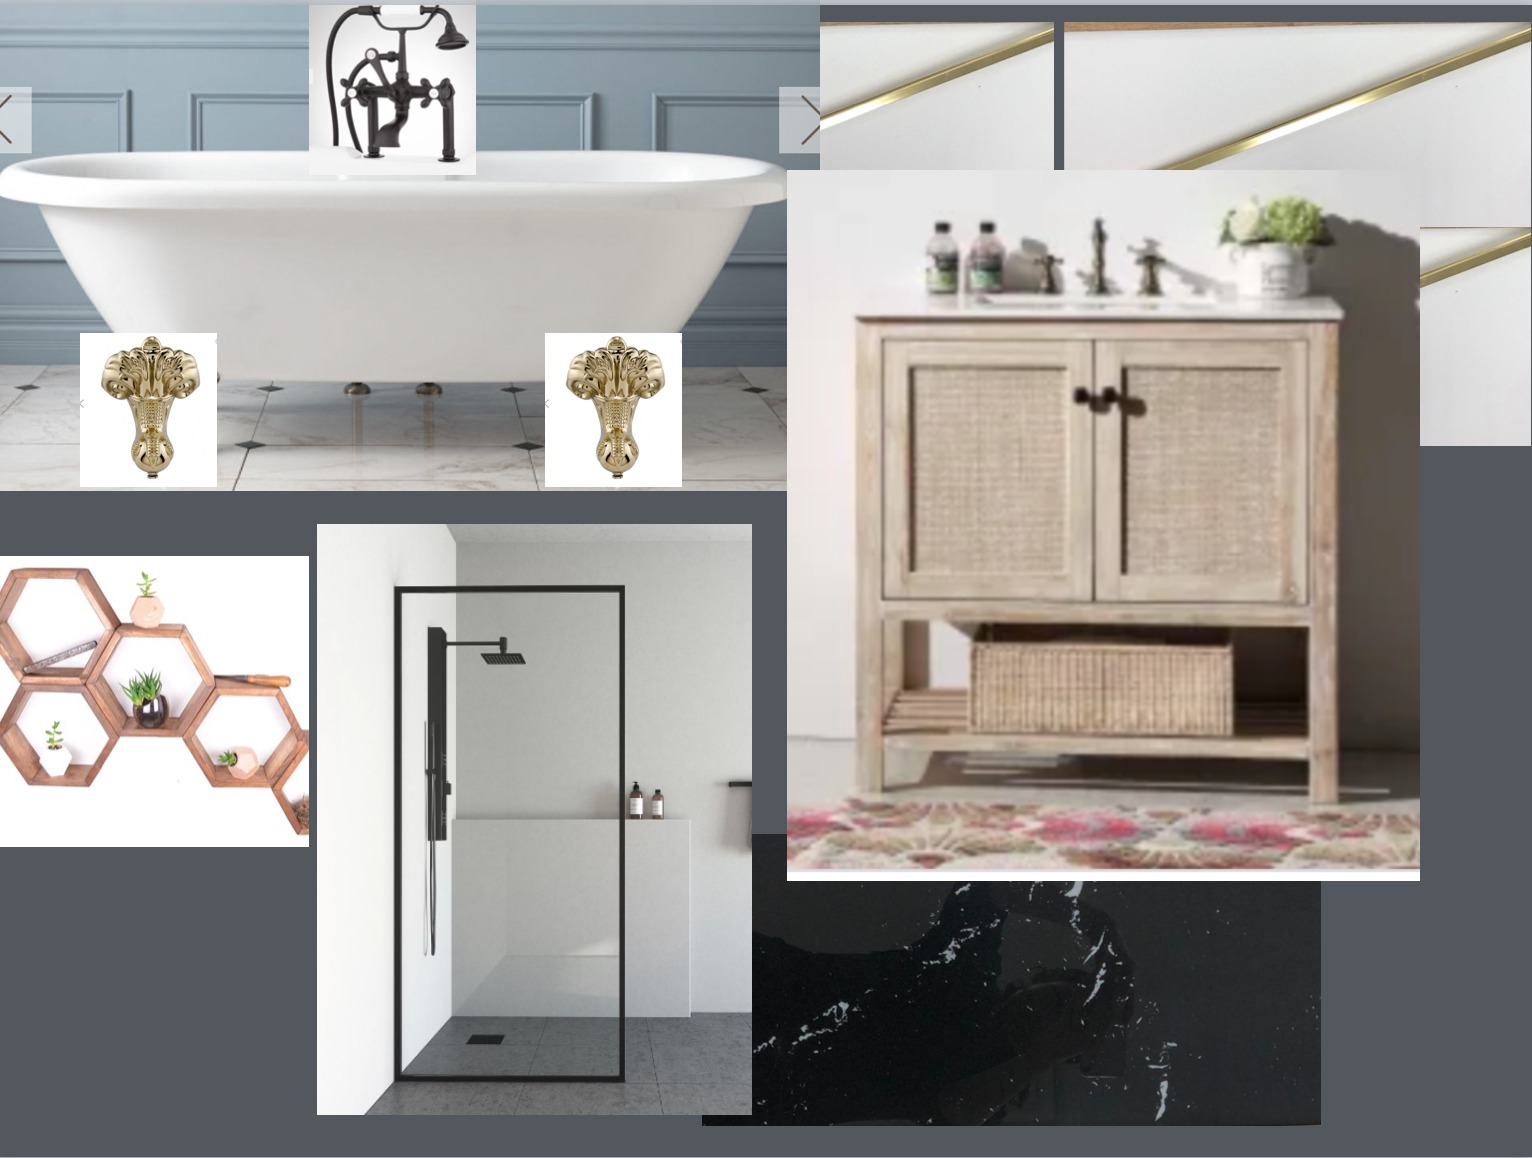
 And there you have it, the design was all ready and I started purchasing. Here is the final moodboard:
 I cannot wait for everything to start coming and to start the actual work of the project, stay tuned for week three to see how that happens! Thank you ORC for encouraging this!
 Thanks for coming along,
Kayla
Thanks for coming along,
Kayla

Then I started sourcing the materials and putting them on the mood board, making tweaks as I got more, so that it will all match. Let’s go one by one and then see the full design, shall we?
I started with the tub, since that was most important to me. Reaching out to my favorite all-things-water vendor Posh Home Bath, I sent him the measurements and asked if it was even possible (the space was pretty small). After some back and forth we got to this tub:
Once we had the bath, I went for the tiles. I wanted black and gold, hubby wanted glossy black with marbled white. So off we go to my favorite tile store Royal Tiles and Granite and picked out the tiles. I drove them quite crazy going back and forth but in the end we settled on a gorgeous black tile for the floors, a simple white tile for the walls, and a beautiful gold metal detail to go with the white tiles behind the vanity. Heres the samples:
Now, for the shower. Considering the placement I knew we needed glass walls so the bathroom would stay open and beautiful. So I ordered the simplest ones, with help from my contractor to make sure I was getting the right ones. The shower body was once again sourced from Posh Home Bath to coordinate with the tub faucet.
The vanity was probably the hardest part. We had to find one that matched the style, which was vintage modern and then also one that matched the color. We finally settled, after hours of searching, on a teak vanity with storage that was narrow enough to fit the space. Then it bothered me that we did not have any other teak items in the bathroom, so I explored Etsy and found some gorgeous teak shelving to put above the toilet to the left of the window. Here they are:
Last but not least we needed lights and a mirror. The mirror was easy, I picked a simple one off wayfair because the wall behind it was so pretty with the gold detail. For the lights, I reached out to my lighting vendor Malka Frost Lighting and we selected some high hats and a stunning sconce for over the tub, as shown here:
And there you have it, the design was all ready and I started purchasing. Here is the final moodboard:
I cannot wait for everything to start coming and to start the actual work of the project, stay tuned for week three to see how that happens! Thank you ORC for encouraging this!
Thanks for coming along,
Kayla